Let’s jump right in! If you were waiting for a sign to start coding, here it is! This tutorial will walk through a few different points to get you going and pique your curiosity in Python.
- Background in Python, what it is, why you should use it
- How to install Python and write your first program
- Errors, Variables, Comments
- Next steps to get you going
- Background in Python, What It Is, Why You Should Learn It
Python is an easily readable programming language that was created by Guido van Rossum in 1991. Python makes it easy to write clear and logical code for all types of projects. Python 2 is no longer supported, so you should be using Python 3 notation and packages. We will only be working with Python 3 code to ensure you get the most up to date information and code examples.
2. How to Install Python and Write Your First Program
We will be using IDLE, Python’s built in Integrated Development Learning Environment. IDLE is great because it opens in a new window and has an interactive environment in which you can type Python code and execute it immediately. IDLE will be presented in each installation process and throughout many tutorials in the future.
2.1 Installing on Windows machines:
Windows does not typically come with a system Python, so if you have a Windows computer you will most likely need to install Python by downloading it from the website:
Note: if you have a 32-bit processor then you should choose to install the 32-bit installer. If you have a 64-bit processor, or are unsure of your computer’s processor, then you should install the 64-bit installer.
https://www.python.org/downloads/windows/
After downloading you should follow the steps to run the installer, which is done by double clicking the downloaded file. It is perfectly fine if your Python version is greater than 3.8.1, just as long as it is not less than 3. You should see the following picture:

When ready, click “Install Now”. We will be using IDLE, Python’s built in Integrated Development Learning Environment. IDLE is great because it opens in a new window and has an interactive environment in which you can type Python code and execute it immediately. Once the installation has finished, open IDLE. Opening IDLE can be done in two steps,
- Click the Start menu, or Windows button, and search/locate the Python 3.8 folder
- Open the folder and select IDLE (Python 3.8)
The Python shell window should look similar to the following image:
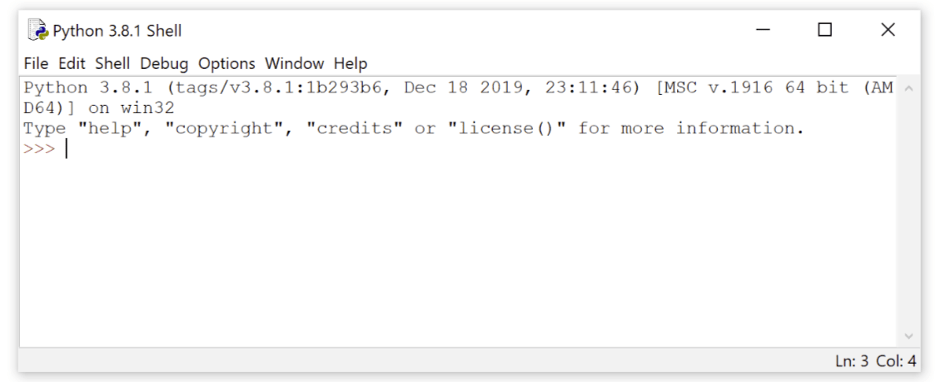
Let’s first locate important pieces of the shell: from the top you can see the Python version that is running and some important information about the operating system.
The >>> symbol is called the Prompt, which simply means you are in Python and it is waiting for you to give some sort of instruction or code to run. You are now ready to skip the next section on installing Python on macOS and jump right into writing your first program!
2.2 Installing on macOS:
To install the latest version of Python (ensuring that you’re running a version greater than 3), download and run the installer from the python.org website:
https://www.python.org/downloads/mac-osx/
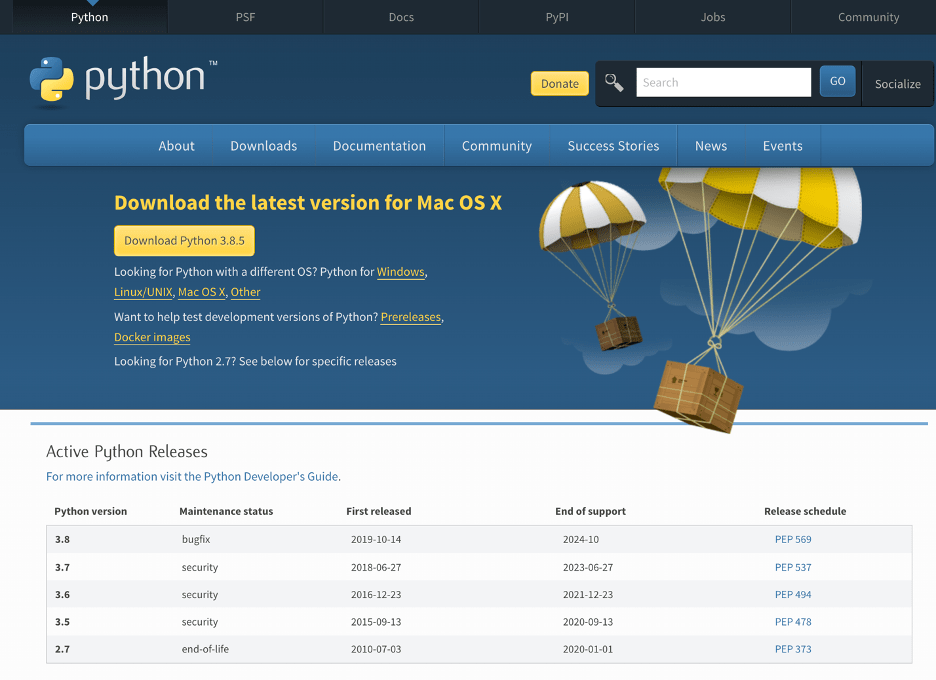
Navigate to the Latest Python 3 Release – Python 3.x.x which can be found beneath the Python Releases for Mac OS X heading towards the top of the page. The page should look like the following:
Download Python’s latest version, then run the installer by double clicked the downloaded file. It should look like the following:

Click “Continue” and follow the prompt until you are asked to agree to the software license agreement, in which you should click “Agree”.
When the installer finishes, click “Close” to exit the installer window.
You can then proceed to open IDLE, which takes a few steps:
- Open Finder and click “Applications”
- Double-click the Python 3.8 folder
- Double-click the IDLE icon
We will be using IDLE, Python’s built in Integrated Development Learning Environment. IDLE is great because it opens in a new window and has an interactive environment in which you can type Python code and execute it immediately. The Python shell window will look similar to the following:
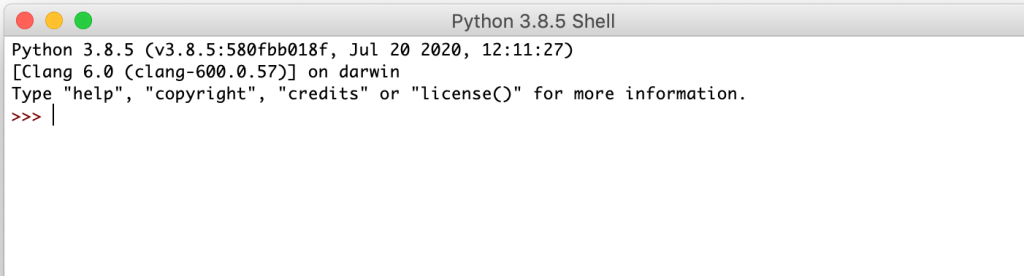
Let’s locate important pieces of the shell: from the top you can see the Python version that is running and some important information about the operating system.
The ‘>>>’ symbol is called the Prompt, which simply means you are in Python and it is waiting for you to give some sort of instruction or code to run. You are now ready to skip the next section on installing Python on macOS and jump right into writing your first program!
2.3 Installing on Ubuntu Linux:
Most of the time, the Ubuntu distribution already has Python installed, but it is most likely not the latest or most up to date version. To check which version you are running, open a terminal window and run the following commands:
$ python –version
$ python3 –version
These commands should return a response in the terminal with a Python version, similar to below:
$ python3 –version
Python 3.8.1
The latest version of Python is Python 3.8.x. Any other version (Python 2.x or Python 3.x) will require an update to ensure you are using the most recent version of Python. Installing Python on Ubuntu is dependent on the version of Ubuntu on your system as well. To find the local Ubuntu running on your system, you can run the following commands:
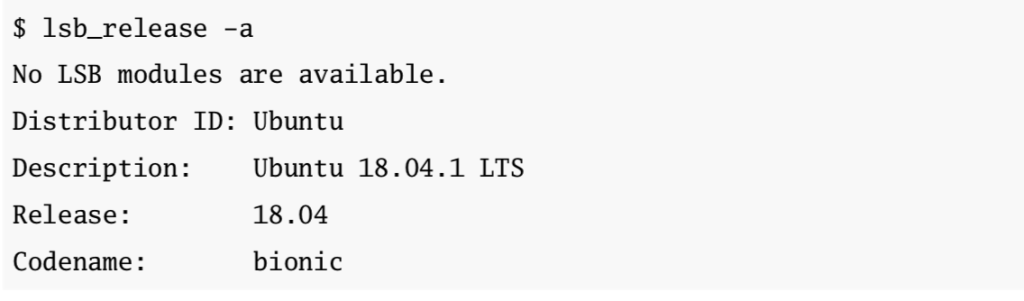
By looking at the version number next to ‘Release’, you can follow the steps below to install the latest version of Python. For most versions, you will need to install the latest Python version.
Ubuntu 18.04 and Higher:
This version does not come with Python 3.8 but it is in the Universe repository. By typing the following commands into the terminal you can run it:
$ sudo apt-get update
$ sudo apt-get install python3.8 idle-python3.8
Ubuntu 17 and Lower:
For these versions, Python is not in the Universe repository, so we will need to get it from a Personal Package Archive (PPA). Here, we will install Python from the deadsnakes PPA. Run the following commands in the Terminal:
$ sudo apt-get-repository ppa:deadsnakes/ppa
$ sudo apt-get update
$ sudo apt-get install python3.8 idle-python3.8
Now, we can check for the correct version of Python installed by running the following commands in the terminal:
$ python3 –version
$ python3.8 –version
It is now time to start writing your first Python program! Open IDLE and let’s get started!
Open IDLE:
To open IDLE from the command line, type the following:
$ idle-python3.8
To open IDLE on some Linux installations, you can type the following shorthand:
$ idle3
We will be using IDLE, Python’s built in Integrated Development Learning Environment. IDLE opens in a new window and features an interactive environment where you can type Python code and immediately execute it.
2.4 Writing Your First Program
Now that you have the latest version of Python installed and running, it is time to write some code! In this section you will:
- Write your very first Python script
- Learn what happens when your script returns an error
- Learn what a variable is and how to figure out its value
- Learn how to write comments
2.4.1 Writing Your First Python Program
If you don’t have IDLE open yet, go ahead and open it. The first thing you will notice is that two main windows open: the interactive window and the editor window. The great part about IDLE is that you can type code into both windows and execute it. The difference is how they execute that code. In this section, we will cover how to execute Python code in both windows.
The Interactive Window:

The Interactive window contains a Python shell. This shell is an interface used to interact with Python. To use this shell, type a bit of code and press “Enter” to run.
This window automatically opens when you start IDLE. You can see some text at the top that tells you what version you are running, certain information about the operating system you are running, and some helpful commands to help you get started.
The ‘>>>’ symbol is called the Prompt, which simply means you are in Python and it is waiting for you to give some sort of instruction or code to run.
Let’s begin!
First, go ahead and type 3 + 2 at the prompt and press “Enter”:
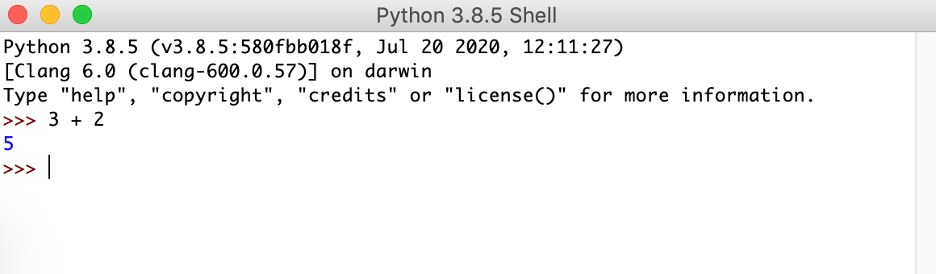
As you can see, Python evaluates the given expression, and returns the results, in this case 5. It then displays another prompt, because it cannot wait for you to keep running more code!
To break down what happens in this interactive window, we can say that Python begins by reading the code you have entered, then evaluates the code, and then returns the result and waits for more instruction to start the process all over again. This can be described as a “loop”. A loop in Python is something we are going to look at in a later tutorial, but for now, we can understand how the interactive shell works by looking at it this way.
This loop is referred to as Read-Evaluate-Print-Loop (REPL). This shell is given the nickname “Python REPL” or “the REPL” by programmers everywhere.
Let’s write your first function!
The very first program every developer writes is the ‘Hello World’ function, which displays the phrase “Hello World” on the screen. This is a rite of passage of sorts for every programmer and with Python functionality, it is super easy!
A function is a snippet of code that performs some tasks and is called by invoking the name. The Hello World function is going to invoke, or call, the print() function with the text “Hello World” as input.
At the interactive window prompt type the word “print” followed by a set of parenthesis, then followed by the text “Hello World” in quotes, then press Enter, you should see this:

Lets break down what we just wrote step by step. The parentheses tell Python to call the “print()” function. We wrap the words Hello World in quotations because we want to indicate that this phrase is really text and not something else, like another function or numbers. IDLE highlights parts of your code in different colors, so you can easily identify the different parts (This is why we love IDLE!). For example, by default, text is highlighted in green, while functions are highlighted in purple!
The interactive window only executes a single line of code at a time, which is extremely useful when trying small code snippets or examples to get started. There is one major issue with this… You can only enter and execute code one line at a time!
There is an alternative, you can save your code in a text file which can then be executed and all lines of code in the file will run at the same time… An entire program! Let’s get to it!!
The Editor Window:
The editor window allows you to write Python files that can be run when you finish writing your code, while leaving the interactive window open where your code will be displayed as the output. It is helpful to arrange the two windows on your screen so you can see both at the same time since the interactive window remains open when you open the editor window.
Let’s write your function in the editor window by selecting from the menu bar “File > New File” and typing the same code you used to print “Hello, World” in the interactive window:
print(“Hello, World”)
IDLE highlights your code in the editor window the same as the interactive window.
Note: when you write code in a Python file, you do not need to include the prompt: >>>
Before running the program, you will need to save it by selecting from the menu bar “File > Save”. Save the file by titling it hello_world.py
The .py is an important extension of Python files because it indicates that this file contains Python code. If you were to save this file with any other extension, it would remove the code highlighting because IDLE only highlights Python code that is stored in a .py file.
Running Programs:
To run the program in the editor window, select from the menu “Run > Run Module”. Another way to run your program is to press the F5 button. Every time you run code from a saved file, you will see something similar to the following in the interactive window:

This is because IDLE restarts the interpreter, or the program that actually exectures your code, every single time you run a file. This is to ensure every program is executed the same way each time.
To open an existing file in IDLE, select from the menu bar “File > Open…” then select the file you wish to open. This file will then open in a new window, making it easy for you to have several files open at the same time. You can also open a file from Windows Explorer or macOS Finder, or a similar file manager. If you right click the file and select “Edit with IDLE” or “Open With > IDLE”, IDLE will open with the file loaded. The best way to run your Python programs is to open them directly in IDLE’s editor window and run them from there.
3. Errors, Variables, Comments
3.1 Errors
It is super important to make mistakes within your code, it’s the best way to learn! Let’s make some mistakes to understand the different error messages and how to fix them! Mistakes in programs are called errors and there are typically two main types of errors: syntax errors and runtime errors.
3.1.1 Syntax Errors:
A syntax error happens when something that has been written is not allowed by the Python language. There are multiple things that can cause a syntax error, so let’s explore some. You will create two different syntax errors using the same code from before.
To create a syntax error, remove the first quotation mark in the hello_world.py file that you created in the previous section. Your code should look like this:

Save this file with the new code and press F5 to run it. IDLE and Python recognizes the error and displays a number of different messages including the following:
In the editor window:

In the interactive window:

Let us discuss some of the unfamiliar terminology:
A “string literal” refers to text that is enclosed in quotation marks. This can be anything! In your code, the term “Hello World” is a string literal. In the interactive window you can see the second message “SyntaxError: invalid syntax”. This is to inform you that there is a syntax error in the code.
To create a different type of syntax error, replace the first missing quotation mark and remove the second quotation mark in the hello_world.py file. Your code should look like this:

Save this file with the new code and press F5 to run it. IDLE and python recognizes the error and displays a number of different messages including the following:
In the editor window:
In the interactive window:

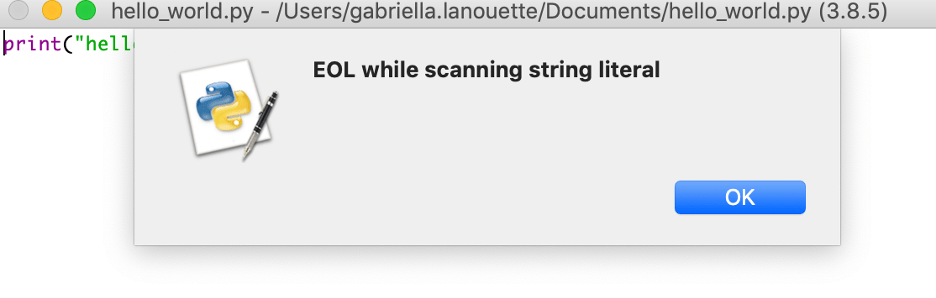
Let us discuss some of the unfamiliar terminology associated with this code snippet:
As discussed above, a string literal is text that is enclosed in quotation marks. In the editor window, you will see the term “EOL while scanning string literal”. EOL means End Of Line. This message informs you that Python finished running the code and got to the end of the line while it was reading the string literal. You must terminate the string literals with quotation marks before the end of the line of code.
IDLE highlights the lines containing the term “Hello World” in red to help you locate the error, in this case the syntax error, quickly. If you exclude the second quotation mark, everything after it – in this case including the closing parenthesis – is now a part of the string literal.
3.1.2 Runtime Errors:
Runtime errors differ from syntax errors in that they run while the program is running, as opposed to syntax errors that get caught before a program starts running. Let us generate a runtime error by removing both quotation marks in the saved hello_world.py file:

If you look carefully when changing the code, you will notice that the text color changed to black when the quotation marks were removed. This is because since there are no quotation marks, IDLE does not recognize Hello World as text. Let’s see what happens when you run the program; save the file and press F5 to find out!
The following error displays in red in the interactive window:

Whenever Python finds an error, it stops running the program and displays several different lines of text, which is called a traceback. The traceback provides extremely useful information about the error found and is vital in debugging code. When an error is found, this is typically called a “bug”, so understanding and reading the tracebacks will help you “debug” your program.
Tracebacks are most useful when read from the bottom up to the top:
- The last line of the traceback gives you the name of the error and the associated error message. In the above message, a NameError occurred because the name “Hello” is not defined anywhere in the code.
- The second to last line in the message shows the code that actually produced the error. Since this is a very simple code snippet and there are very few lines thus far, it is fairly easy to determine where the error lies. This information provided in this line is more helpful when you have much larger files and more code.
- The third to last line in the message displays the name of the file and the line number so you can go to the exact spot in your code where the error was found and debug your program!
3.2 Variables
You can think of a variable as similar to the variables you have learned about in math, for example, if x = 3 then you have assigned the value of 3 to the variable ‘x’. Variables are names, such as x, that can be given to a value, such as 3, and then used later to refer to the value throughout your code. Variables are incredibly important to programming for multiple reasons:
- Variables keep values readily accessible. For example, you can assign the value of some operation to a variable so that you do not have to perform that same tedious operation every time you need the value.
- Variables are used to give values context. The number 3 from above could mean many different things in different contexts: the number of apples bought, the number of pages in an article, the number of times someone has accessed a website, so on and so forth. So, giving the value 3 a name such as apples_bought gives the value context and gives it clear meaning in your code.
There are some important rules to follow when naming variables in Python. We will explore some of those in the following section.
3.2.1 The Assignment Operator
An operator is a symbol that performs some operation on one or multiple values. A few examples of operators are: +, -, *, and /. For context, the + operator takes one number to the left of the operator and one number to the right of the operator, and find find the sum. 2 + 5 = 7. Values are assigned to variables using a symbol called the assignment operator (=). The assignment operator takes the value to the right of the operator and assigns it to the name on the left, the variable name.
Let’s edit the hello_world.py file, assign some variables, and text before printing it for practics. Type the following into the interactive window:

To break down the steps we just committed by changing the code, let us go line by line. First, you created a variable named welcome_greeting, and then assigned it the string value “Hello, World” using the assignment operator ‘=’.
By typing: print(welcome_greeting), the interactive window displayed the output Hello, World because Python looked for the variable named welcome_greeting, found that is was assigned the value “Hello, World”, and replaced the variable name with the value “Hello, World” before calling the function print.
You would have seen a NameError if you had not executed ‘welcome_greeting = “Hello, World”’ before executing print(welcome_greeting), similar to the error we saw previously when running: print(Hello, World) – without parenthesis.
It is vital to understand that although the ‘=’ looks like the equals sign from normal mathematics classes, it has an entirely different meaning in Python. This can cause some frustration when beginning coding in Python, so it is important to remember that whatever is to the right of the ‘=’ operator will be assigned to the variable on the left.
Variable names, similar to many other things in Python, are case sensitive, so the variable name: welcome_greeting is not the same as the variable: Welcome_Greeting. You will receive an error explaining that: Welcome_Greeting is not defined if you tried to run the code in the interactive window because you did not assign Welcome_Greeting a value.
it is important to remember that whatever is to the right of the ‘=’ operator will be assigned to the variable on the left.
When beginning, make sure to check the names of your variables and ensure that you are using the correct cases.
3.2.2 Inspecting Values (Interactive Window)
After assigning a variable a value, instead of going through the process of typing print(), all you have to do is press Enter after typing in the variable a second time! This is called a variable inspection! Type the following into IDLE’s interactive window:

Voila! Variable inspection! Now, print the string assigned to welcome_greeting using the print() function as such:

Do you notice anything different about the output displayed between the two methods? When you use the print() function, the output is displayed in a more human-readable fashion, which for string literals, means displaying an output without any quotation marks.
By simply pressing Enter, Python prints the value assigned to the variable, in this case welcome_greeting, as it appears in your code literally. Since you assigned the string literal “Hello, World” to welcome_greeting, the output is displayed in quotation marks. The majority of the time, variable inspection will provide the most useful information as opposed to using the print() function.
Note: In Python, you can create sting literals by using single or double quotation marks, but you cannot mix and match the two.
For example, it is valid to type:
- “Hello, World”
- ‘Hello, World’
It is not valid, however, to type:
- “Hello, World’
- ‘Hello, World”
There are instances where you can assign a digit and a string literal to two different variables, yet get the same output. Type the following into the interactive window:
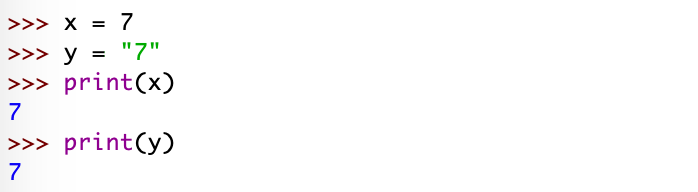
As you can see, the variable ‘x’ was assigned a digit while the variable ‘y’ was assigned a string literal, but when they were printed, they returned the same output. Let’s inspect their respective variable value:
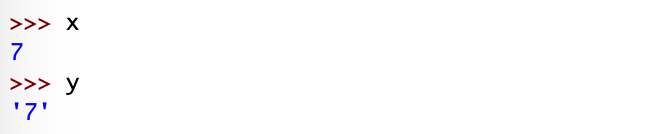
When working with variables, it is key to remember that print() function returns a readable representation of the value assigned to the variable, while variable inspection returns the value assigned to the variable exactly as it appears in the code.
Note: variable inspection only works in the interactive window. You must use the print() function to display any output in the editor window. Something we will discuss further in a later section.
3.2.3 Naming Convention for Python Variables
It is common for programming languages to write variable names in mixedCase, which is a system where you capitalize the first letter of each word, except the first word, and leave all other letters in the name in lowercase. For example, numberApples or listOfGames, are written in mixedCase.
Python is slightly different in the sense that it is more common to write variable names by keeping everything lower case with underscores in between each word. For example, number_of_apples and my_dogs_age are typical Python variable names. There are no specific rules that specify you must write your variable names in this form, but the practice is codified in a document called PEP 8.
PEP 8 is regarded as the official writing style guide for writing Python code.
PEP stands for Python Enhancement Proposal. This is a design document used by Python users to propose new features.
By following this writing style specified in PEP 8 you can ensure your Python code is readable, which makes sharing your code with other programmers easier and more effective.
3.2.4 Naming Convention Rules for Variable Names
The length of the variable name is entirely up to you, but there are a few rules that Python programmers follow when naming variables. They must contain upper-case, lower-case, or a combination of the two: letters (A-Z, a-z), digits (0-9), and underscores (_). Aside from English letters and digits, variable names in Python can contain different valid Unicode characters as well. It is important to know that variable names cannot begin with a digit.
Examples of valid variable names:
- my_dogs_name
- _b3ta
- number_of_apples
Examples of variable names that are NOT valid:
- 3_apples_bought
- 2cupsoftea
- 24YearsOld
Note on Unicode: Unicode is a standard for characters used in many of the world’s writing systems to be represented as characters digitally. Specifically, this means that variable names can contain letters from alphabets that are not English; this includes letters such as ü and á, as well as Arabic, Japanese, and Chinese symbols.
3.2.5 Guidelines for Choosing a Good Variable Names
It is important to be descriptive when naming your variables, especially in a complex program or model. This may demand the use of multiple words, instead of just a letter or single word. There is nothing wrong with using long, descriptive names in your programs.
To use an example, we can assign the value 50 to the variable m such as:
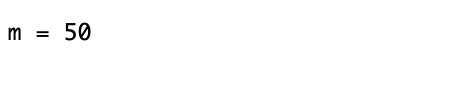
The variable name m is not descriptive and could stand for anything. To make this more descriptive, you can assign the value 50 to the full word, miles:
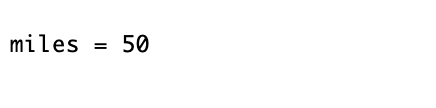
Using the word miles is a step in the right direction, but we can be more descriptive by providing more context in the variable name, so we know exactly what is being assigned. Since there is no context, it is hard to tell if the 50 is the number of miles to the destination, the miles traveled already, or the speed one is traveling.
By using the following name, miles_per_hour, there is no doubt that we are looking at the value for the speed we are traveling:
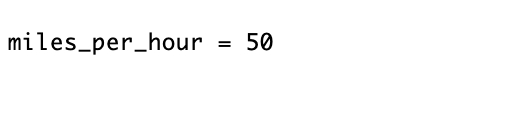
Note: a good naming convention rule to follow is to limit the variable name to three to four words, to ensure descriptiveness but not make the name excessive in length.
3.3 Comments!
More often than not, looking through some of your old code, or another programmers code, can lead you to ask yourself, “what does this code do?” or “why did they write this this way?”. This is an especially common problem when overlooking code that you wrote when you were beginning your coding journey! As you become a more skilled programmer, you will write better, more pythonic code and it will be hard to read your old code and wonder what you were trying to do if you didn’t leave yourself any comments.
To avoid this dilemma, you can leave comments in your code, which are lines of text that do not have any bearing on the way the program runs. These comments can document what your code does, why you are making decisions you are making, or some description of the code. Let’s talk about how to write comments.
3.3.1 Writing Comments
The most common and pythonic way to write comments is to start a new line of code with the ‘#’ character. The ‘#’ character is ignored when you run your code. This means that Python skips that line or any text after the ‘#’ sign; and moves on to the next line.
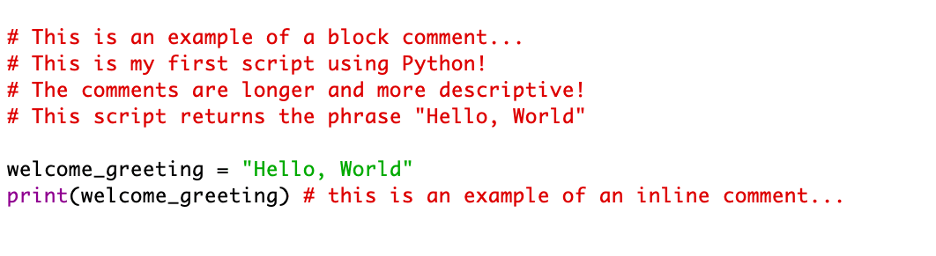
Block comments are comments that start on a new line, as opposed to inline comments which appear on the same line as the code they refer to. Let’s write some comments:
Here is a code snippet with both types of comments:

Note: you can use the ‘#’ character inside a string. For example, type the follow code into your interactive window:

It is a good rule of thumb to keep comments short, or as short as possible within the context of your code. If you need to write a good chunk of comments, you can begin on a new line as long as the ‘#’ character precedes the text. For example:
Comments come in handy when testing code, because you can easily comment out sections to ensure the program runs the way it is designed to run. Placing a ‘#’ character at the beginning of a line of your code allows you to run your program as if that specific line did not exist without actually deleting the code.
There are a couple of ways to comment out a section of code in IDLE, you can highlight one or multiple lines that you wish to be commented and press the following:
- macOS: Ctrl + 3
- Windows: Alt + 3
- Linux: Crtl + D
To remove the comments from the code, highlight the commented lines and press the following:
- macOS: Ctrl + 4
- Windows: Alt + 4
- Linux: Ctrl + Shift + D
As with all things Python, we want our code following PEP 8 styling to be more pythonic. Comments should be written in complete sentences, with a single space between the ‘#’ character and the first word, as follows:

This follows for inline comments as well, and PEP 8 suggests two spaces, one between the code and one after the ‘#’ character, as follows:

As you become more comfortable writing and reading Python code, you will be using comments sparingly, as recommended by PEP 8. It is a good rule of thumb to not use comments where it is already obvious what the code is doing. Redundant comments, such as the following, are not recommended, because it is clear what the code is performing, and it is unnecessary to describe in a comment what is happening:

It is a good rule of thumb not to use comments where it is already obvious what the code is doing. Redundant comments are not recommended, because it is clear what the code is performing, and it is unnecessary to describe in a comment what is happening
4. Next Steps to Get You Going
Congratulations! You have reached the end of First Steps, Python 101! In this post, you have learned some background in Python, why you should use it, and how to install Python.
You wrote your first program using the print() function, displaying the rite of passage phrase, ‘Hello, World!’.
You then learned about different errors, such as syntax and runtime errors. Syntax errors occur before IDLE runs a program that contains invalid code. Runtime errors occur while a program is running.
Using the assignment operator, which is different than the ‘=’ symbol in math, you assigned values to different variables, then inspected them in the interactive window.
And lastly, you learned how to write comments in your code for yourself and other Python programmers, so that you can understand how the code is functioning.
It is important when learning something new to perform that action every day; this is even more important when learning to code. So, to hold you over before the Python 102 blog post drops (soon!!), here are some examples and exercises to get you going and get you comfortable writing Python code:
Exercises:
- Write a program that displays the following text: “I love learning Python!!!!”
- Assign the number 2 to a variable, assign the number 5 to a different variable, then add them together to explore the output.
- Write a program that stores the string literal “Hello, World!” in one variable, then stores the string literal “I am a Pro!” in another variable, then displays then together in one output.
- Create a syntax error, then fix your error.
- Write a PEP 8 recommended block comment and inline comment.
- Explore the interactive window and do some math!
- What happens if you enter 7 == 0 in the window? What output do you see?
- What happens if you enter 7 == 7 in the window? What output do you see?
Stay updated on upcoming tutorials and posts by subscribing below:

print(“Super easy to follow”) # Looking forward to the next installment!
LikeLike
Thank you! I’m so excited you’re on this journey with me!
LikeLike